The Flashlight Test and Other Ways to See if Your Ducts Are Truly Clean
Gray Duct
Learn how to tell if duct cleaning made a difference: flashlight test, DIY checklist, airflow checks & red flags for poor jobs.
How to Tell If Duct Cleaning Made a Difference (Before Reading Any Further)
Knowing how to tell if duct cleaning made a difference doesn’t require special equipment or a second opinion — there are clear, practical signs you can check yourself within the first 24 to 48 hours, and others that reveal themselves over the following weeks.
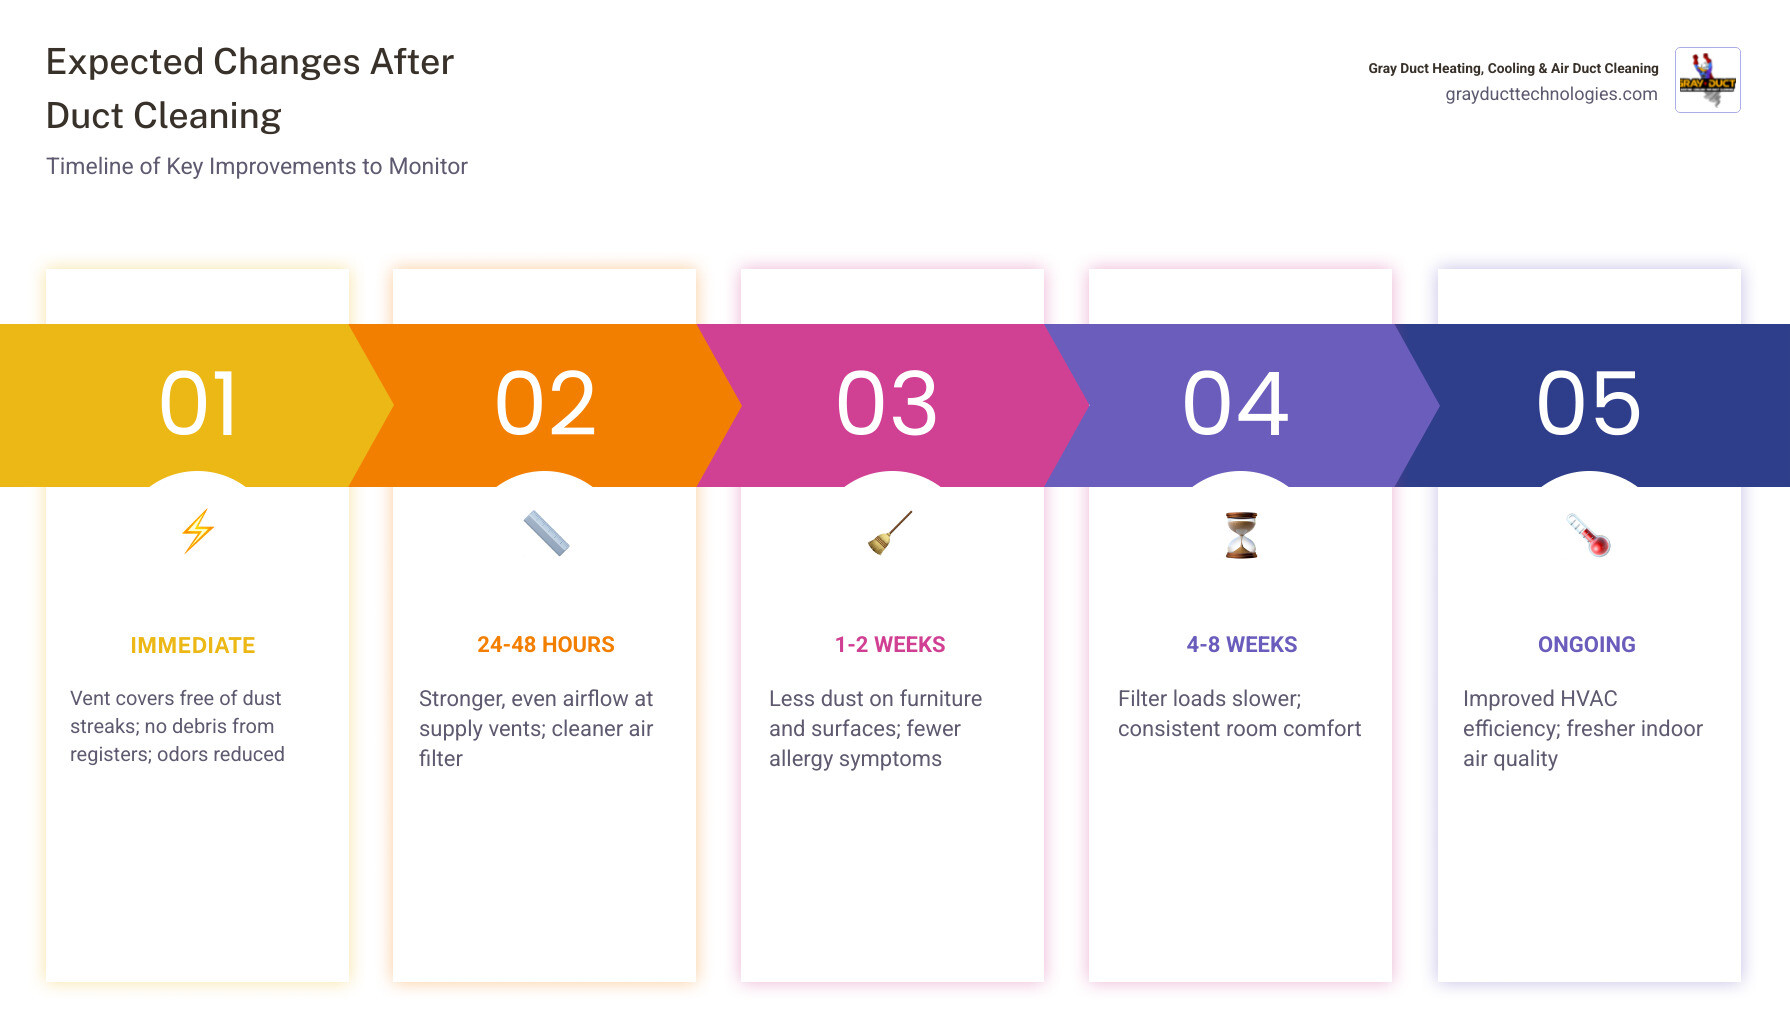
Here’s a quick overview of what to look for:
| Timeframe | What to Check |
|---|---|
| Immediately after | Vent covers free of dust streaks; no debris blowing out of registers; reduced stale odors |
| Within 24–48 hours | Stronger, more even airflow at supply vents; cleaner air filter than expected |
| First 1–2 weeks | Less dust settling on surfaces; reduced allergy or respiratory symptoms |
| 4–8 weeks | Filter loading more slowly than before; improved comfort across rooms |
If your cleaning checked none of these boxes, there’s a good chance the job wasn’t done thoroughly — and this guide will help you figure out exactly why.
You just paid for a professional duct cleaning. Maybe you scheduled it because dust was settling faster than it should, someone in your household was struggling with allergies, or your HVAC system just didn’t feel like it was performing the way it used to. Whatever the reason, you deserve to know whether the service actually delivered results — not just a receipt.
The problem is that duct cleaning is invisible by nature. The work happens inside your walls, and most homeowners never see what’s in there before or after. That makes it easy for a rushed or incomplete job to go unnoticed. According to the EPA, a properly cleaned duct system should leave every component — from supply ducts and return grilles to the blower, coils, and drain pan — visibly clean, with no debris released back into the living space when the system runs.
This guide walks you through exactly how to verify that standard was met — starting with a simple flashlight test you can do in the next five minutes.
I’m Jason Giandalia, founder of Gray Duct Heating, Cooling & Air Duct Cleaning and a NADCA-certified Air Systems Cleaning Specialist (ASCS) with hands-on experience helping Twin Cities homeowners assess how to tell if duct cleaning made a difference in their specific systems. Every home is different, and I’ll show you the verification steps that actually matter.
How to Tell If Duct Cleaning Made a Difference Right Away
Right after a proper cleaning, the first clues are usually simple and visual.
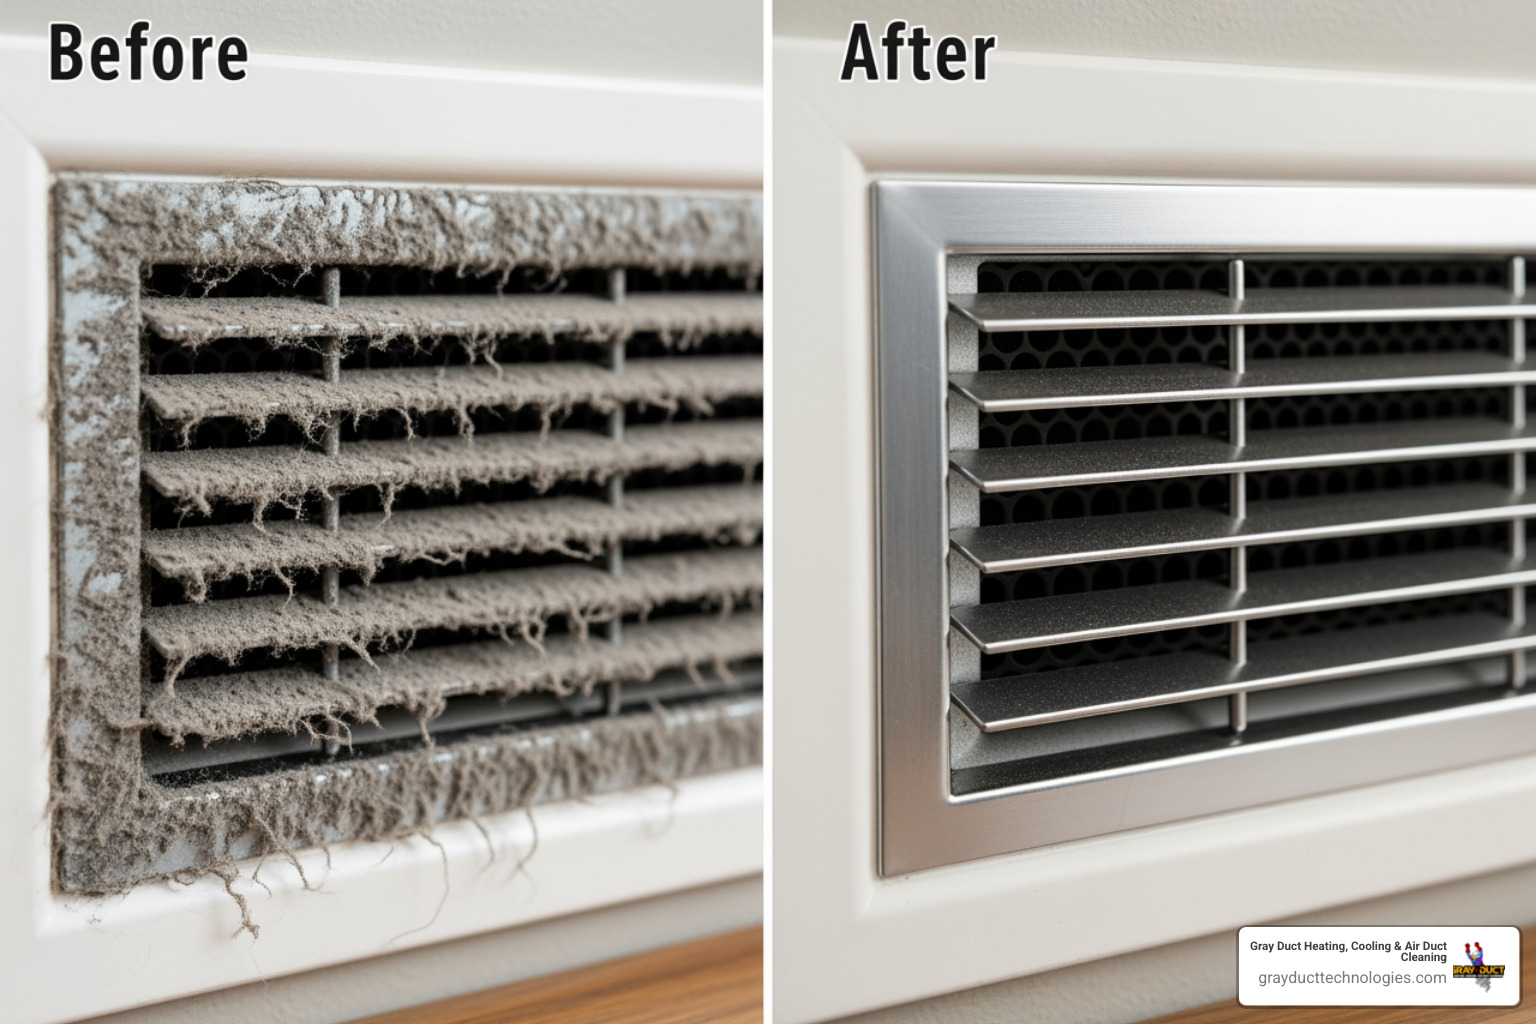
Check the vent covers and return grilles first. They should not have dusty streaks, fuzzy lint on the edges, or dark buildup around the slats. Register edges should look wiped down rather than ignored. If the covers were removed during cleaning, they should also be put back on securely, with screws tightened and no rattling.
Then turn your system on. Watch and feel.
A well-cleaned system should not puff out visible dust when the blower starts. You also should not see loose debris sitting inside the first few inches of ductwork. In many homes, stale odors or that faint “old dust” smell improve quickly, especially if buildup included pet hair, pollen, or smoke residue.
You may also notice that airflow feels more consistent from room to room. Not dramatic, jet-engine strength airflow — just cleaner, steadier delivery.
The Flashlight Test: What Properly Cleaned Ducts Should Look Like
The flashlight test is the fastest DIY way to check how to tell if duct cleaning made a difference.
Remove a supply register or return grille if you can do so safely. Shine a bright flashlight into the duct opening. A phone light works in a pinch, but a real flashlight shows more detail.
Here is what you want to see:
- Bare metal or clean interior surfaces
- Light staining only, not fuzzy debris
- No clumps of dust
- No matted pet hair
- No soot-like coating
- No thick pollen buildup
- No loose material ready to blow back into the house
Here is what you do not want to see:
- Dust blankets along the bottom of the duct
- Hair wrapped around seams or corners
- Black streaks that look untouched
- Debris sitting just beyond the vent opening
- Signs that only the visible lip was cleaned
A little discoloration does not always mean the duct is still dirty. Older metal can look aged even when clean. What matters is whether contamination is still present as removable debris.
If you want a visual reference for what a real cleaning can look like, see Before & After of an Air Duct Cleaning in Minneapolis, Minnesota.
Will You Notice Less Dust and Better Air Quality Immediately?
Sometimes yes. Sometimes not by dinner time.
Odors often improve faster than dust levels. If dust, pet dander, or smoke residue was contributing to a stale smell, the air may seem fresher within a day or two. But dust settling on furniture may take longer to judge, because your home has many dust sources besides ducts: people, pets, bedding, cooking, open windows, and daily activity all contribute.
Allergy and breathing symptoms can also take days or weeks to change. That is especially true during pollen season in Minnesota, when outdoor air is already working overtime.
A good rule of thumb:
- Odor changes can happen quickly
- Airflow changes may show up right away
- Dust reduction usually becomes clearer over 1 to 2 weeks
- Symptom improvement may be gradual
Also, your filter may load up a bit after cleaning as it captures remaining loosened particles from the system and household air. That is normal early on.
For more on the indoor air side of the equation, read Health Benefits of Clean Air Ducts.
A Homeowner’s DIY Post-Cleaning Inspection Checklist
You do not need to crawl through your attic like a home-improvement reality show contestant. But you should do a practical post-cleaning check.
Use this list:
- Inspect several supply vents in different rooms
- Check at least one large return grille
- Look a few feet into reachable duct openings with a flashlight
- Confirm vent covers are reinstalled properly
- Check that access panels are closed and sealed
- Inspect the filter slot and confirm a filter is installed correctly
- Look at the blower compartment if it is safely accessible
- Ask whether the coil area and drain pan were inspected or cleaned if needed
- Run the system in heating or cooling mode, depending on the season
- Watch for dust blowing out during startup
- Listen for new rattles, whistling, or loose panel sounds
How to Inspect Your Ducts and Vents Yourself After Cleaning
Start with the easy areas first.
Turn off the HVAC system before removing any vent cover. Use a screwdriver if needed. Take a flashlight and your phone camera so you can zoom in and document what you see.
Focus on reachable sections only. You are not trying to inspect the whole branch line from the living room floor. You are checking whether the visible and near-visible sections look truly cleaned.
Look for:
- Dust clumps in corners
- Black or gray streaks on the duct floor
- Pet hair caught on screws or edges
- Debris left around vent boots
- Loose dust on return grille backs
Also look at workmanship details. Were the screws replaced? Are vent covers straight? Were access points resealed neatly? A sloppy finish can hint at a sloppy process.
If you are unsure what dirty ductwork typically looks like, Identifying Dirty Home Ductwork is a helpful comparison point.
What Proof a Professional Should Provide Before You Sign Off
Visual proof matters because most of the system is hidden.
A thorough service should be able to show that the work reached beyond the vent covers and into the system itself. That means documentation for:
- Supply branch lines
- Return branch lines
- Main trunk lines
- Air handler or furnace cabinet areas
- Blower compartment
- Coil area if accessible and relevant
- Return drop or plenum areas
Before-and-after photos are useful. Video footage is even better, because it shows depth and helps confirm the images were taken in your system, not from a stock library or a duct fairy tale.
Service notes should also explain what was cleaned, what was found, and whether there were issues such as moisture, damaged duct lining, or suspected mold needing separate attention.
For a full walkthrough of what the process should include, see Air Duct Cleaning Process.
How Long a Thorough Cleaning Should Take
While every home is different, a real whole-system cleaning is not usually a blink-and-it’s-over appointment.
Research and industry guidance commonly put a proper job at a minimum of about 1.5 to 2 hours, and larger or more complex systems can take longer. Time is needed for:
- Setup and protection
- Creating negative pressure
- Agitating debris inside the ducts
- Cleaning supply and return runs
- Cleaning accessible HVAC components
- Final inspection and reassembly
If the visit felt extremely fast, that is worth questioning. Proper cleaning is not just vacuuming around the vent openings and calling it a day.
The method matters too. Source-removal cleaning with strong vacuum collection and proper containment is the standard approach. HEPA-filtered collection is important because it helps keep loosened contaminants from being dumped back into the home.
Performance Signs Your HVAC System Is Benefiting
A good cleaning can improve how the system feels, but the changes are usually practical rather than magical.
You might notice:
- More even airflow from supply vents
- Fewer stuffy rooms
- Reduced musty or dusty smells
- Better comfort consistency between rooms
- Less obvious dust blowing or settling near registers
In some homes, operation may also sound smoother if buildup in key areas was affecting airflow. That said, not every comfort problem is caused by dirty ducts. Duct leaks, poor insulation, dirty coils, filter issues, or equipment problems can all create similar symptoms.
Airflow and System Performance Changes That Point to Effective Cleaning
Airflow is one of the most useful real-world clues.
After cleaning, check whether rooms that used to feel weak on airflow now feel closer to the rest of the house. You can do a basic hand test at each vent, or hold a tissue near the airflow to compare strength room by room.
Positive signs include:
- Stronger airflow at previously weak supply vents
- Better return suction at return grilles
- More even temperatures across rooms
- Fewer hot or cold spots
- Faster recovery after the thermostat changes
If heavy debris was restricting parts of the system, cleaning can help restore normal movement of air. This is especially true in homes with pet hair, renovation dust, or long-term neglect.
For a broader look at why the whole process matters, read Why Professional Air Duct Cleaning Matters.
Does Duct Cleaning Always Improve HVAC Efficiency?
No. And this is where homeowners deserve a straight answer.
Duct cleaning can help when contamination is actually interfering with airflow or when other components tied to airflow are also cleaned. But it does not automatically solve every efficiency issue.
If your system still has problems after cleaning, the cause may be something else:
| If you see this | It may point to |
|---|---|
| Clean ducts but weak airflow everywhere | Dirty filter, blower issue, or undersized system |
| One or two rooms still uncomfortable | Duct balancing issue, damper issue, insulation, or leakage |
| High utility use with no comfort gain | Coil problem, refrigerant issue, aging equipment, or duct leakage |
| Musty smell continues | Moisture issue, microbial growth, or drain/coil problem |
| Dust remains heavy throughout home | Indoor activity, filter quality, envelope leaks, or housekeeping sources |
The EPA has long noted that duct cleaning is not proven to prevent health problems in every case, and routine cleaning is not always necessary. What matters is whether contamination was present and whether the full system was properly addressed.
Simple Ways to Measure Results Over the Next Few Weeks
If you want better proof than “it seems better,” track a few things for 2 to 8 weeks.
Try this simple at-home scorecard:
- Dust check: Note how fast dust returns to dark furniture or shelves
- Filter check: Inspect the filter after 1 to 2 weeks, then monthly
- Symptom log: Track allergy, sneezing, or throat irritation patterns
- Odor log: Notice whether stale or musty smells are reduced
- Comfort notes: Record which rooms feel better or still inconsistent
- Utility pattern: Compare energy use only across similar weather periods
- Airflow notes: Recheck vent strength in rooms that used to be weak
If you want more measurable data, a basic indoor particle counter can help track particulate levels before and after, though results can be affected by cooking, cleaning, and open windows. Humidity also matters, since damp conditions can make air feel stale even when ducts are clean.
For more on the big-picture indoor air side, visit Air Duct Cleaning for Indoor Air Quality.
Red Flags That the Cleaning Was Poor, Incomplete, or Made Things Worse
Not every cleaning produces good results. Sometimes the warning signs show up fast.
Watch for:
- Dust blowing from vents after the service
- Loose debris still visible near register openings
- Vent covers that look untouched
- New rattling or gaps around access panels
- Strong chemical smells that linger
- Missing documentation or vague answers about what was cleaned
- Dirt still visible in returns, plenums, or blower areas
- Moisture introduced into ducts
- Damage to duct liner or vent hardware
Warning Signs the Job Was Rushed or Only Partially Done
A rushed job often leaves a pattern behind: the easy-to-see parts get attention, and the deeper system gets skipped.
Common signs include:
- The appointment was unusually short for the size of the home
- Only some vents appear cleaned
- Return ducts seem ignored
- Dust puffs out when the blower starts
- The blower compartment still looks dirty
- The plenum or return drop still has visible buildup
- No before-and-after photos were provided
- No post-cleaning walkthrough happened
That last point matters. If nobody showed you the results, it is harder to verify that the work reached the full system.
For examples of the problems dirty ductwork can create, see Dirty Ductwork: Common Problems.
When Cleaning Can Worsen Air Quality and How to Prevent It
Yes, cleaning can make air quality worse if it is done improperly.
This usually happens when contaminants are loosened but not contained. Examples include:
- Poor vacuum containment
- Exhaust that is not properly filtered
- Dust spread through the house during cleaning
- Moisture introduced into ducts
- Mold disturbed and spread
- Damaged internal duct liner releasing particles
The EPA also advises caution with chemical biocides and sealants. These should not be used casually, and no one should promise miracle health results from spraying chemicals into ducts. Ozone-generating treatments are also not something we recommend for occupied homes.
There is another important caution: if duct insulation or surrounding materials may contain asbestos, cleaning work should not proceed until that risk is properly addressed.
The simplest prevention step is making sure the work follows source-removal methods, uses proper containment, and includes inspection for moisture or material problems before cleaning begins.
Filter Care After Cleaning: The Step That Protects Long-Term Results
Your air filter becomes extra important after cleaning.
Why? Because even after a thorough job, the system and home still need to capture normal airborne particles. Also, some remaining loosened particles may reach the filter during the first days or weeks.
Our practical advice:
- Check the filter sooner than usual after cleaning
- Replace it if it looks loaded early
- Use the right size and fit so air does not bypass it
- Follow a regular replacement schedule based on filter type, pets, and household conditions
- Pair duct cleaning with good filter habits if you want the results to last
Filter care is also one of the main ways to protect long-term results between cleanings. In many homes, ducts may need attention every 2 to 3 years, especially with pets, allergies, smoke exposure, or remodeling dust, but timing depends on conditions inside the home.
For more on scheduling and maintenance, read How Often Should You Clean Your Air Ducts? What Minneapolis Homeowners Need to Know.
EPA and NADCA Standards That Confirm a Successful Cleaning
The best answer to how to tell if duct cleaning made a difference is not hype. It is standards.
EPA guidance says the post-cleaning benchmark is simple: all parts of the system should be visibly clean, and no debris should be released into the home when the system operates.
NADCA standards align with the same big idea: cleaning should address the whole HVAC air distribution system, not just the register faces.
That includes, as applicable:
- Supply ducts
- Return ducts
- Registers, grilles, and diffusers
- Heat exchanger components
- Cooling coils
- Drain pan
- Fan motor and housing
- Air handler or furnace cabinet
- Accessible plenums and related components
How to Tell If Duct Cleaning Made a Difference According to EPA Guidance
According to EPA guidance, successful cleaning is verified by inspection, not guesswork.
Use these checkpoints:
- Components are visibly clean
- No dust or debris is released from registers
- Heating and cooling operation appears normal after service
- Access panels are properly reinstalled
- You are able to inspect or review evidence from cleaned sections
- Claims are realistic and not exaggerated
That last one is worth repeating. A good cleaning can reduce contamination in the system, but it is not a cure-all for every health or dust complaint in a home. EPA guidance is careful about that, and we are too.
What a Standards-Based Cleaning Includes From Start to Finish
A standards-based cleaning should follow a logical order:
- Inspection first to identify contamination and problem areas
- Protection of the home and HVAC system
- Establishing negative pressure and containment
- Agitating and removing debris from supply and return ducts
- Cleaning accessible system components, not only vent openings
- Addressing related concerns such as coil or blower cleanliness if needed
- Reassembling and sealing access points correctly
- Final walkthrough with documentation and post-cleaning verification
That process is a lot more meaningful than simply hearing, “All set.”
If you are still weighing whether cleaning was necessary in the first place, Is Air Duct Cleaning Worth It? adds useful context.
Conclusion
If you have been wondering how to tell if duct cleaning made a difference, start simple: use the flashlight test, inspect your vents and returns, run the system, and look for real changes in dust, odor, airflow, and comfort over the next several weeks.
The biggest signs of success are usually clear:
- Visibly clean vent openings and accessible duct surfaces
- No debris blowing back into the home
- Better airflow consistency
- Slower dust buildup over time
- Cleaner filter performance and better day-to-day comfort
Just as important, remember what a good result does not look like: rushed timing, missing photos, untouched returns, dust blowout, chemical overuse, or vague answers about what was actually cleaned.
At Gray Duct Heating, Cooling & Air Duct Cleaning, we help homeowners across Minneapolis, Saint Paul, Lakeville, Eden Prairie, Woodbury, Rochester, and surrounding Twin Cities communities verify results the right way: with visual proof, whole-system attention, and practical follow-through such as filter maintenance and ongoing HVAC care.
If you want help evaluating your last cleaning or you are ready for a thorough inspection and service, get more info about air duct cleaning services.
Need HVAC Help?
Our NADCA-certified technicians are ready to help with all your heating, cooling, and air quality needs.
Get Free EstimateMore Articles
 HVAC Tips
What to Do When Your AC and Furnace Share the Same Air Filter
 HVAC Tips
Addressing Drafty Rooms Before Winter: Duct Sealing vs. Window Replacement
 HVAC Tips
Dryer Vent Routing: Rigid Metal vs. Flexible Foil in Cold Climates
 HVAC Tips
Why We Inspect the Heat Exchanger So Closely During Fall Maintenance
 HVAC Tips
Upgrading to a Two-Stage Furnace: Is the Investment Worth It in Minnesota?
Related Articles
Ready to Get Started?
Whether you need a repair, maintenance, or a new system installation, our expert team is here to help.